How to Add multiple buttons to a Hostspot
The hotspots in GoThru Virtual Tour Editor, support one button, directly on the main popup card, and multiple buttons under the Menu List. But some times you would like more buttons under the main card, and not hidden under a menu. For that case, you can add all your buttons under the Menu List, then using a bit of CSS we can move them to be displayed under the main card.
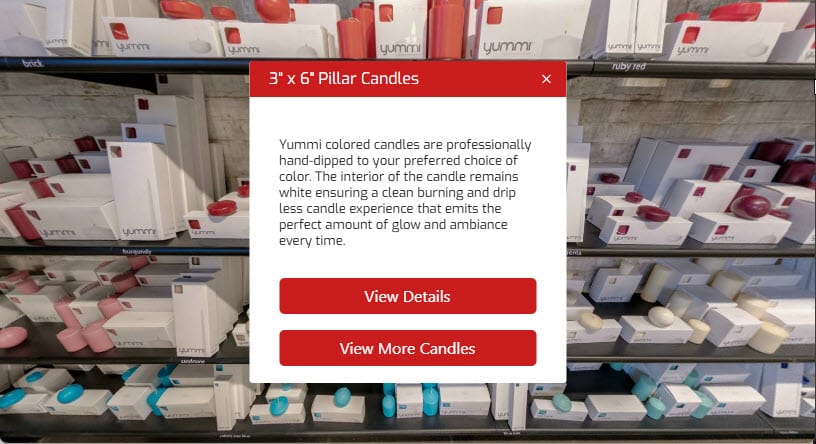
Preview:
Let's see how to create them:
1) Add a New Hostpost from the Plugin Manager
2) In the Popup Content section, add the Hotspot Title, Image (if you have one) and Text.
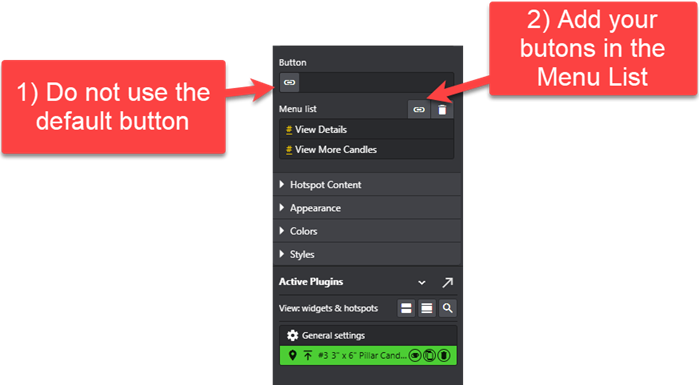
3) Add the buttons:
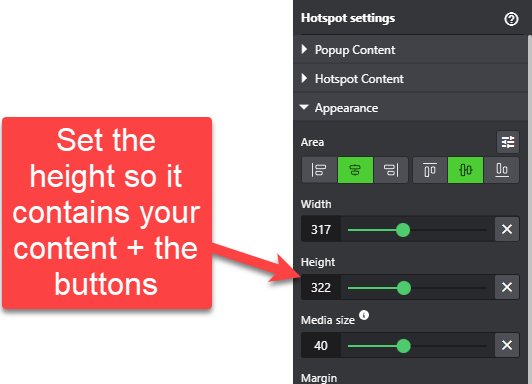
4) Go to Apperance section and modify the height (you might have to come back here to adijust, after you add the CSS)
5) Go to Style section, and add the CSS. Please make sure you change the top value and the bacground-color values, to match your tour style.
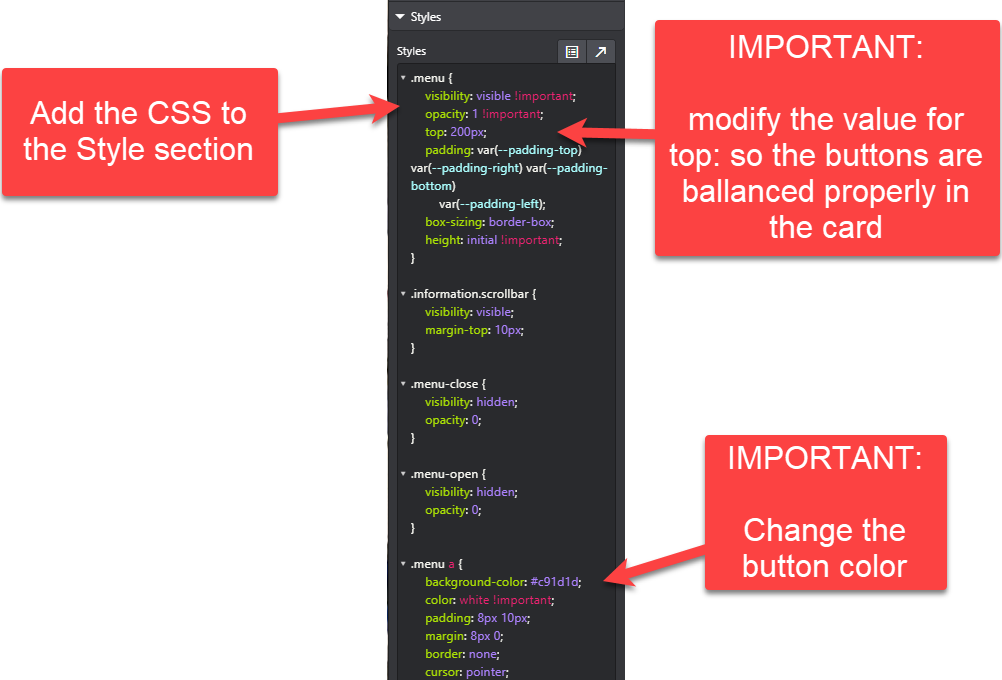
CSS:
.menu {
    visibility: visible !important;
    opacity: 1 !important;
    top: 250px;  // modify here to the correct height for your hotspot
    padding: var(--padding-top) var(--padding-right) var(--padding-bottom)
        var(--padding-left);
    box-sizing: border-box;
    height: initial !important;
}

.information.scrollbar {
    visibility: visible;
    margin-top: 10px;
}

.menu-close {
    visibility: hidden;
    opacity: 0;
}

.menu-open {
    visibility: hidden;
    opacity: 0;
}

.menu a {
    background-color: #ba975f; // modify here the colour of your buttons
    color: white !important;
    padding: 8px 10px;
    margin: 8px 0;
    border: none;
    cursor: pointer;
    text-align: center;
    text-decoration: none;
    line-height: 20px;
    display: inline-block;
    width: -webkit-fill-available;
    border-radius: 5px;
}